![]()
![]()
How to efficially install, host, and maintain lightning fast Wordpress websites inside Docker Desktop.
Navigation
- Prerequisite
- Creating a Custom Network
- Folder Organization
- Configuring .env file
- Configuring docker-compose.yml file
- Execute and Test
- Reverse Proxy Steps
Prerequisite
-
If you are using Cloudflare to host your domain, you NEED to make sure that it's SSL/TLS encryption mode is set to Full (strict). Be default, domains are set to Flexible and you'll get thrown in an infinite loop when using a reverse proxy.
-
For these instructions we'll be using the example domain called " website.com " and will be changing things to " wp-website-com " in the appropriate locations in the files.
-
For very nice organization, I recommend keeping the ' wp- ' part at the beginning of the naming scheme so you can easily filter out containers and find what you're looking for very quickly and neatly.
-
The password to extract all of the tutorial files from the zip file is: JHammaH
Creating a Custom Network
- Creating a Custom Network
Folder Organization
- Folder Organization
Configuring .env file
- This is the .env file. Here you will want to enter your cloudflare API token as well as the email address you log into cloudflare with. This .env file will create variables that you can reference in your Caddyfile.

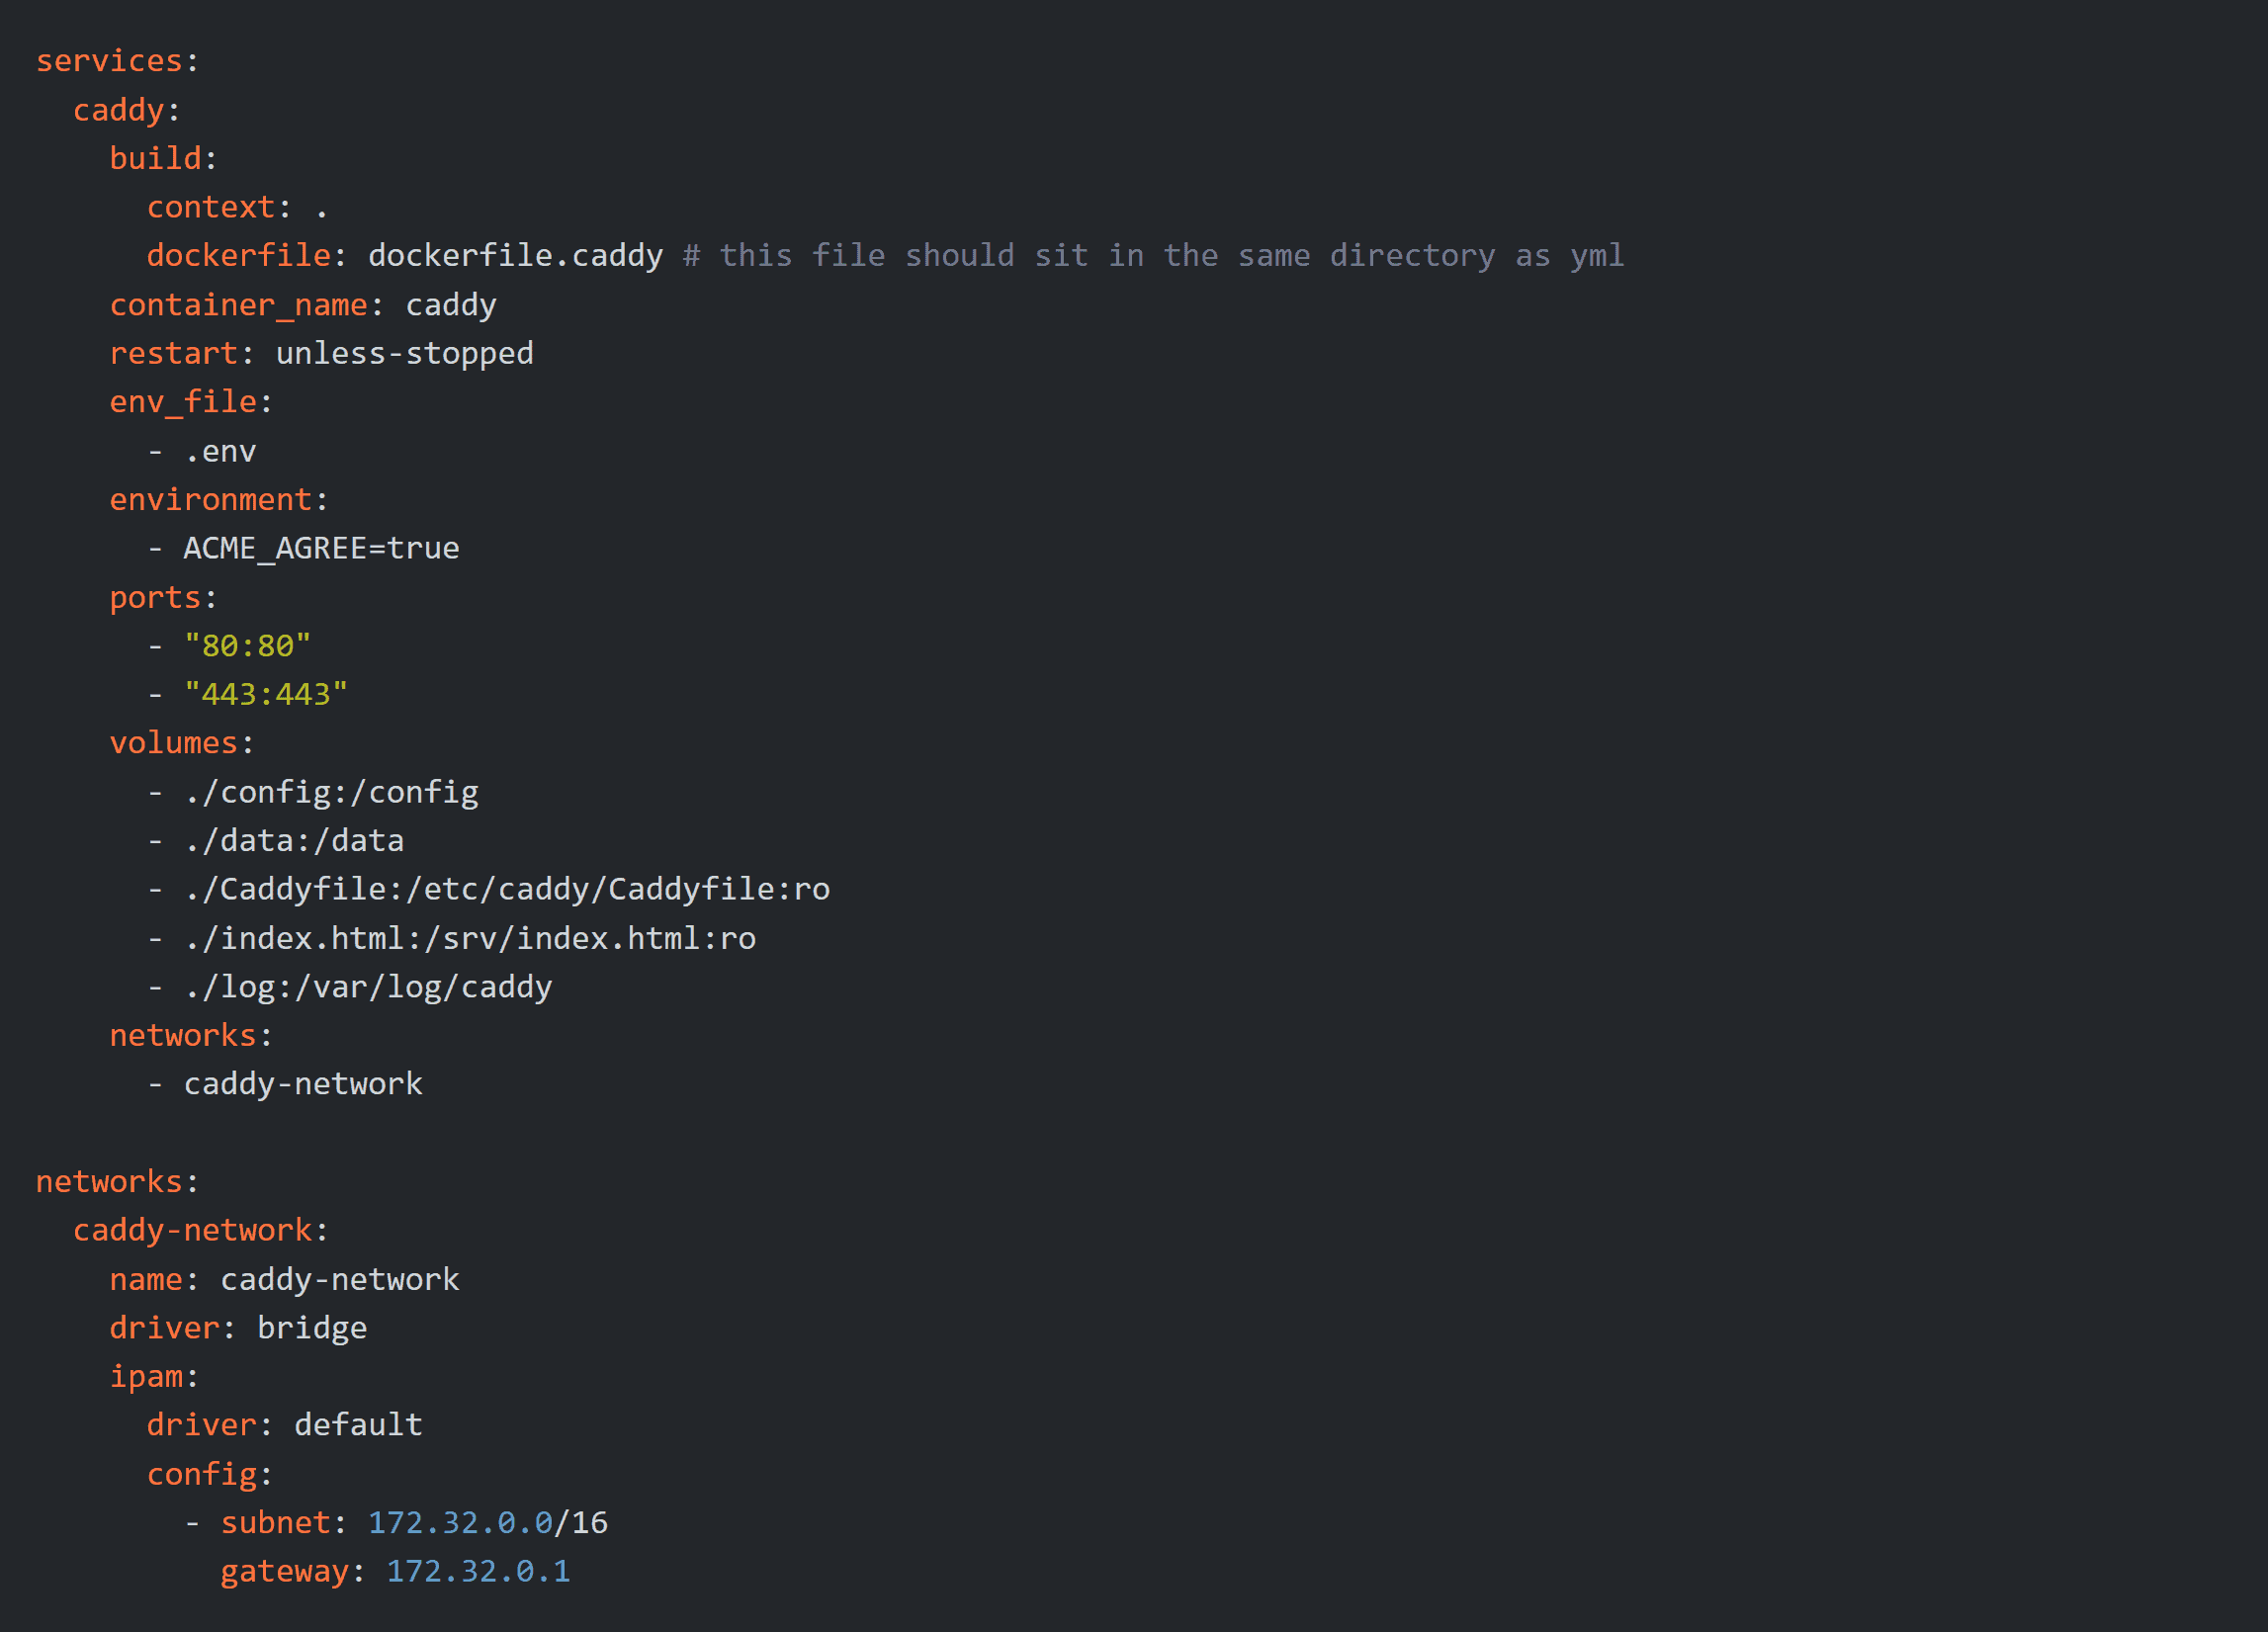
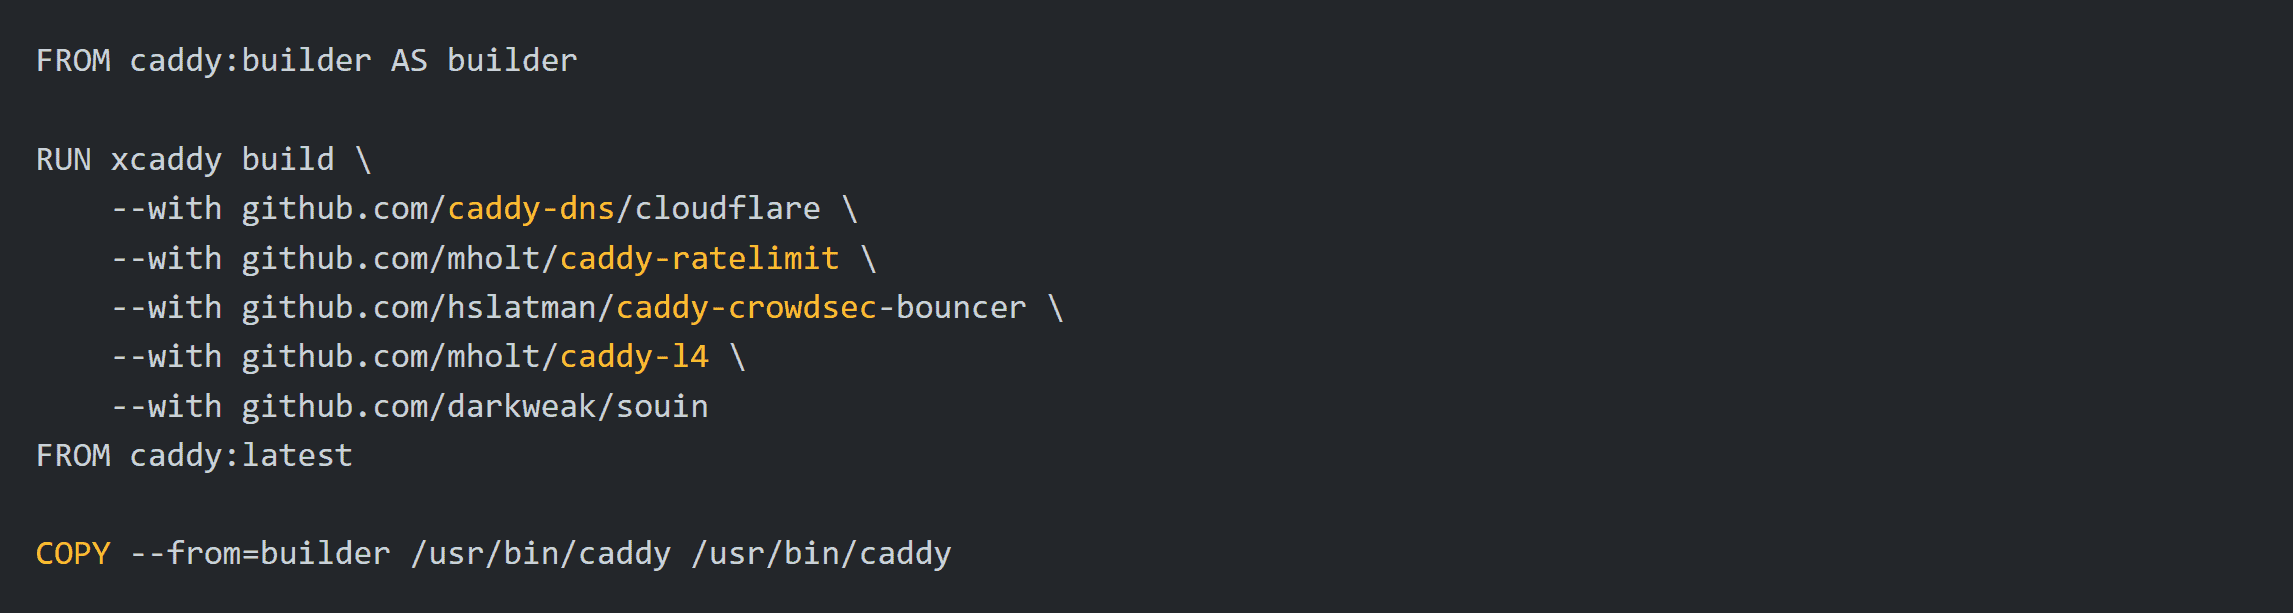
Configuring docker-compose.yml file
- Configuring docker-compose.yml file
code
Execute and Test
- Execute and Test
docker-compose up -d
Reverse Proxy Steps
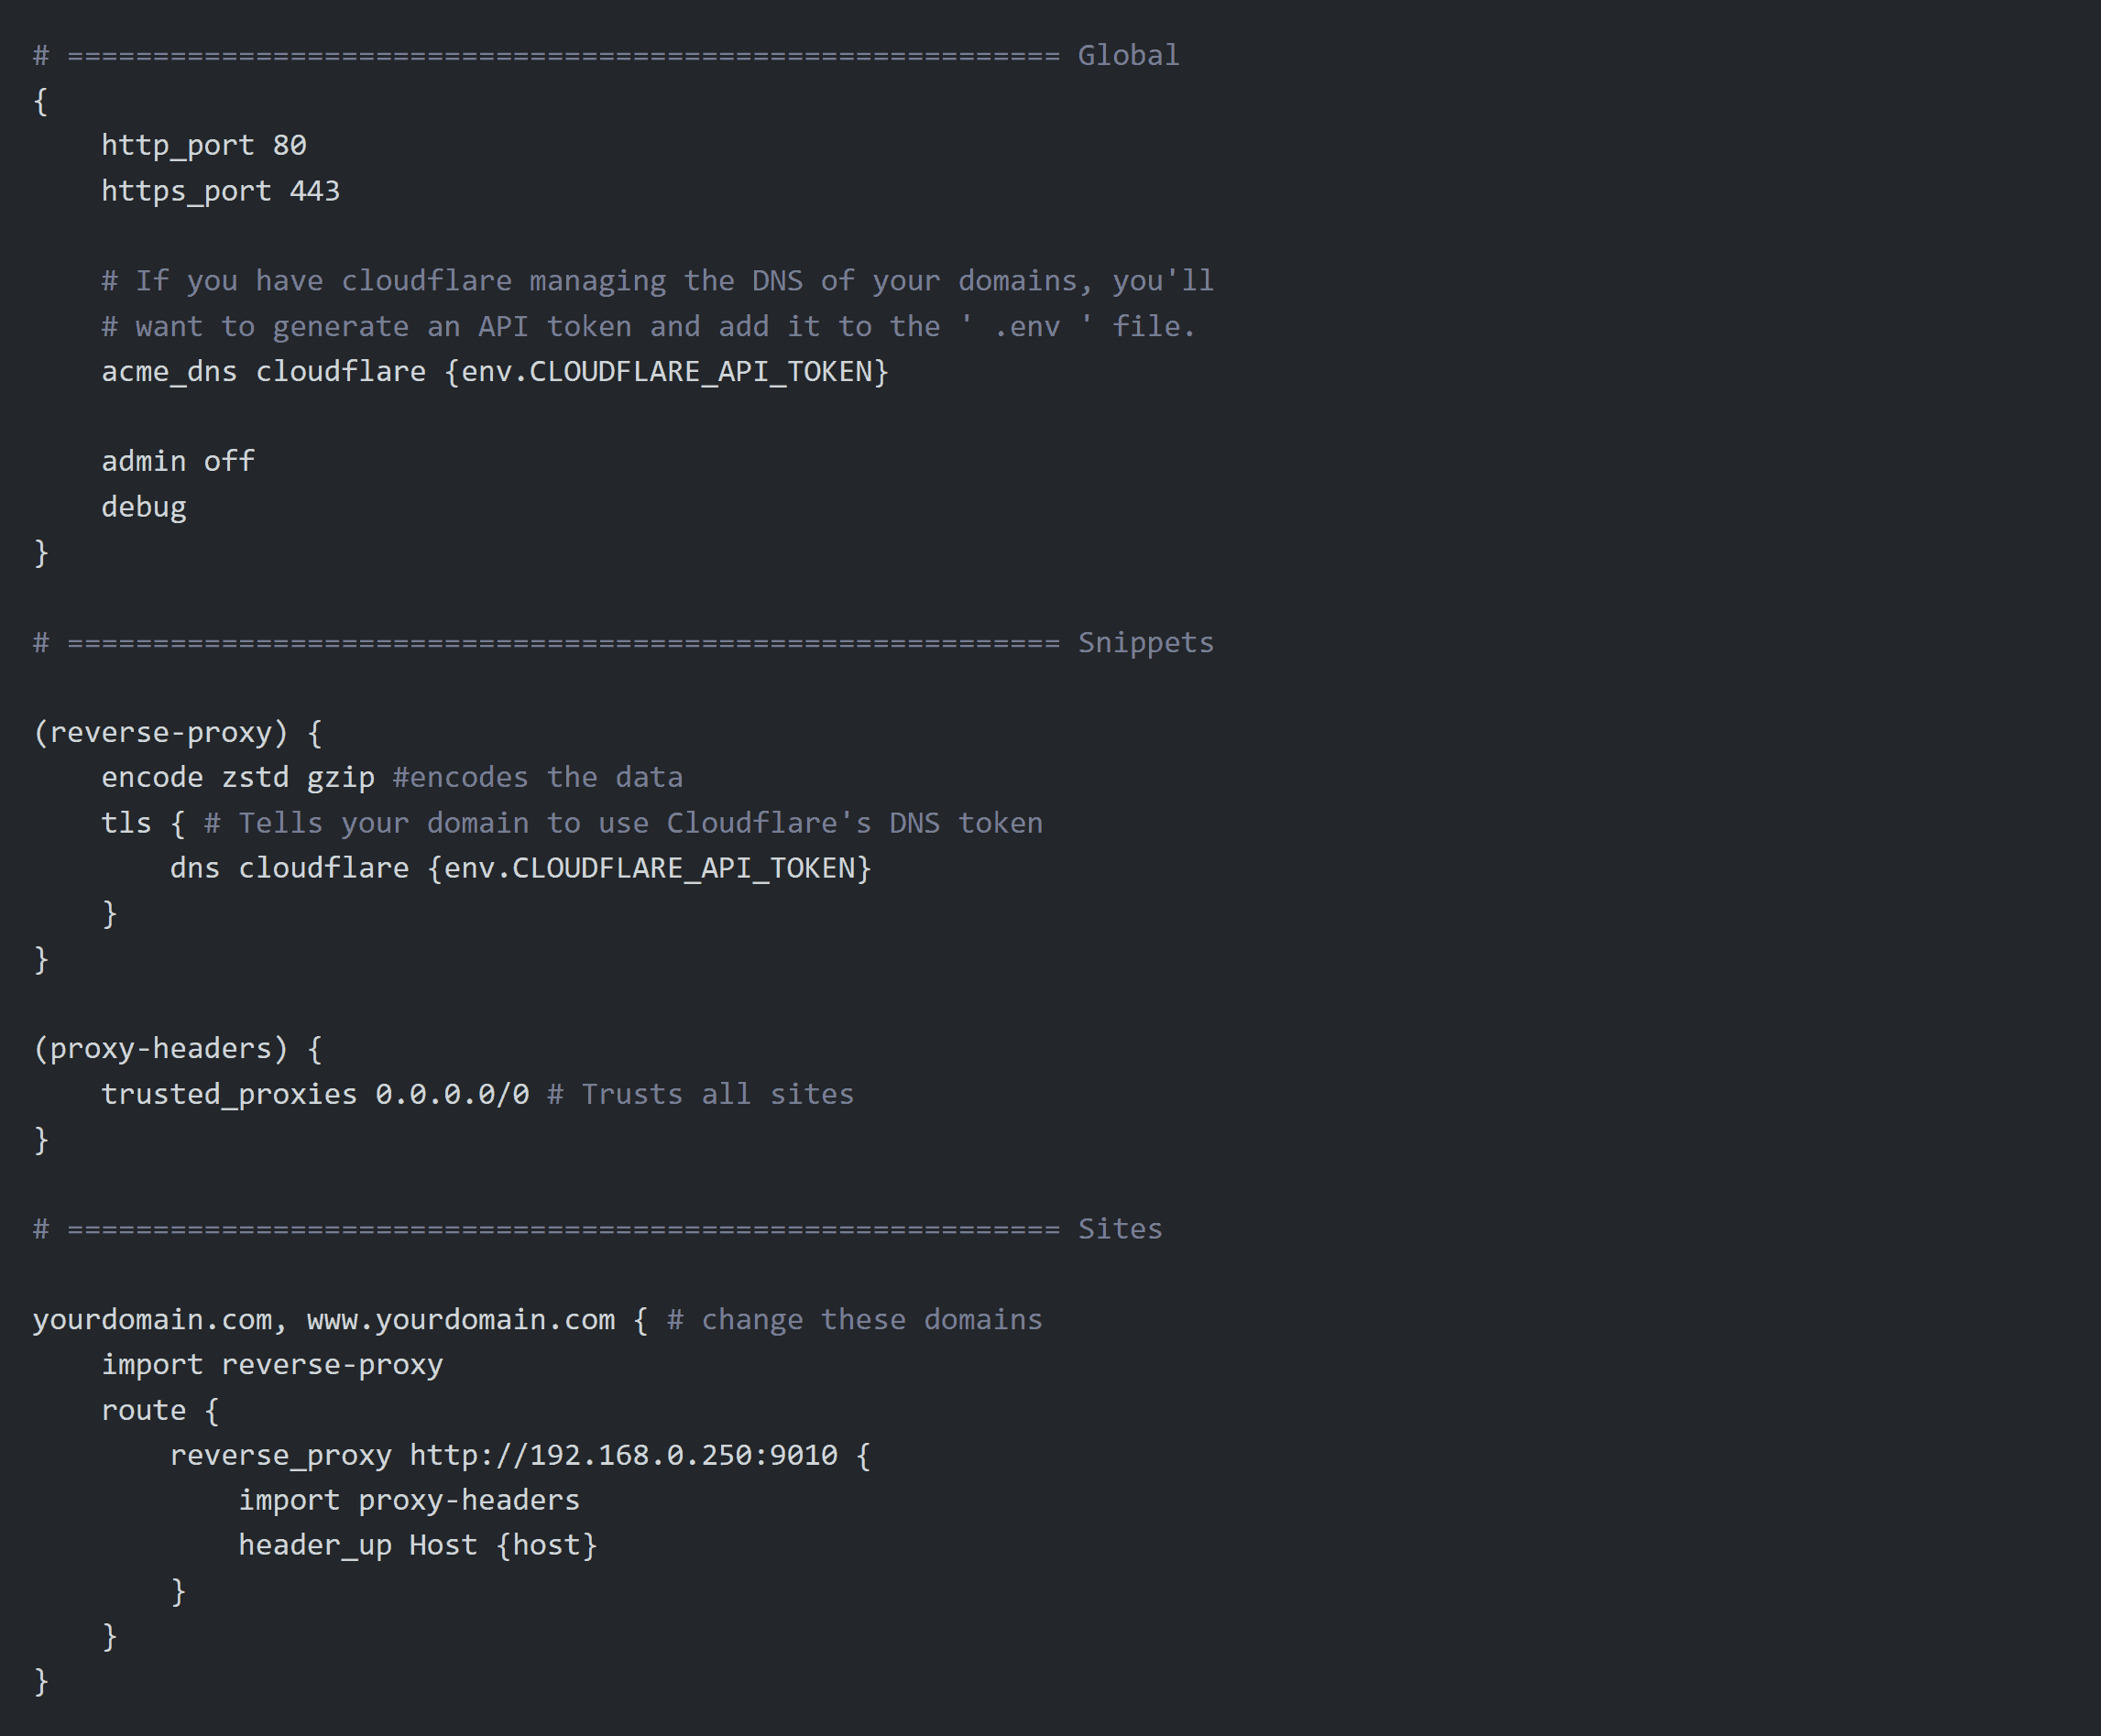
- This is the Caddyfile. This file tells Caddy what and how to do things.
wp-config.php configuration
wp-config.php configuration
docker-compose up -d
Caddyfile configuration
wp-config.php configuration
docker-compose up -d