
Install Caddy with packages (xcaddy) inside Docker Desktop
# Menu
- [Prerequisite](#prerequisite)
- [Install](#install)
- [Configuring docker-compose.yml file](#configuring-docker-composeyml-file)
- [Configuring .env file](#configuring-env-file)
- [Configuring dockerfile.caddy file](#configuring-dockerfilecaddy-file)
- [Configuring Caddyfile](#configuring-caddyfile)
- [Execute and finish](#execute-and-finish)
# Prerequisite
This is the main Caddy yml file that you'll use to create your containers. Adjust settings as needed.
- **If you have Cloudflare managing your domain, make the the TLS/SSL encryption mode is set to Full (Strict) and NOT Flexible.**
- **When adding CNAME entries to your domains, make sure Cloudflare's proxy is disabled for each CNAME record.**
# Install
This tutorial will show you how to install Caddy with with packages automatically with xcaddy as a Docker container. Installing extra packages is optional but it's good to have a few of them.
1️⃣
## Configuring docker-compose.yml file
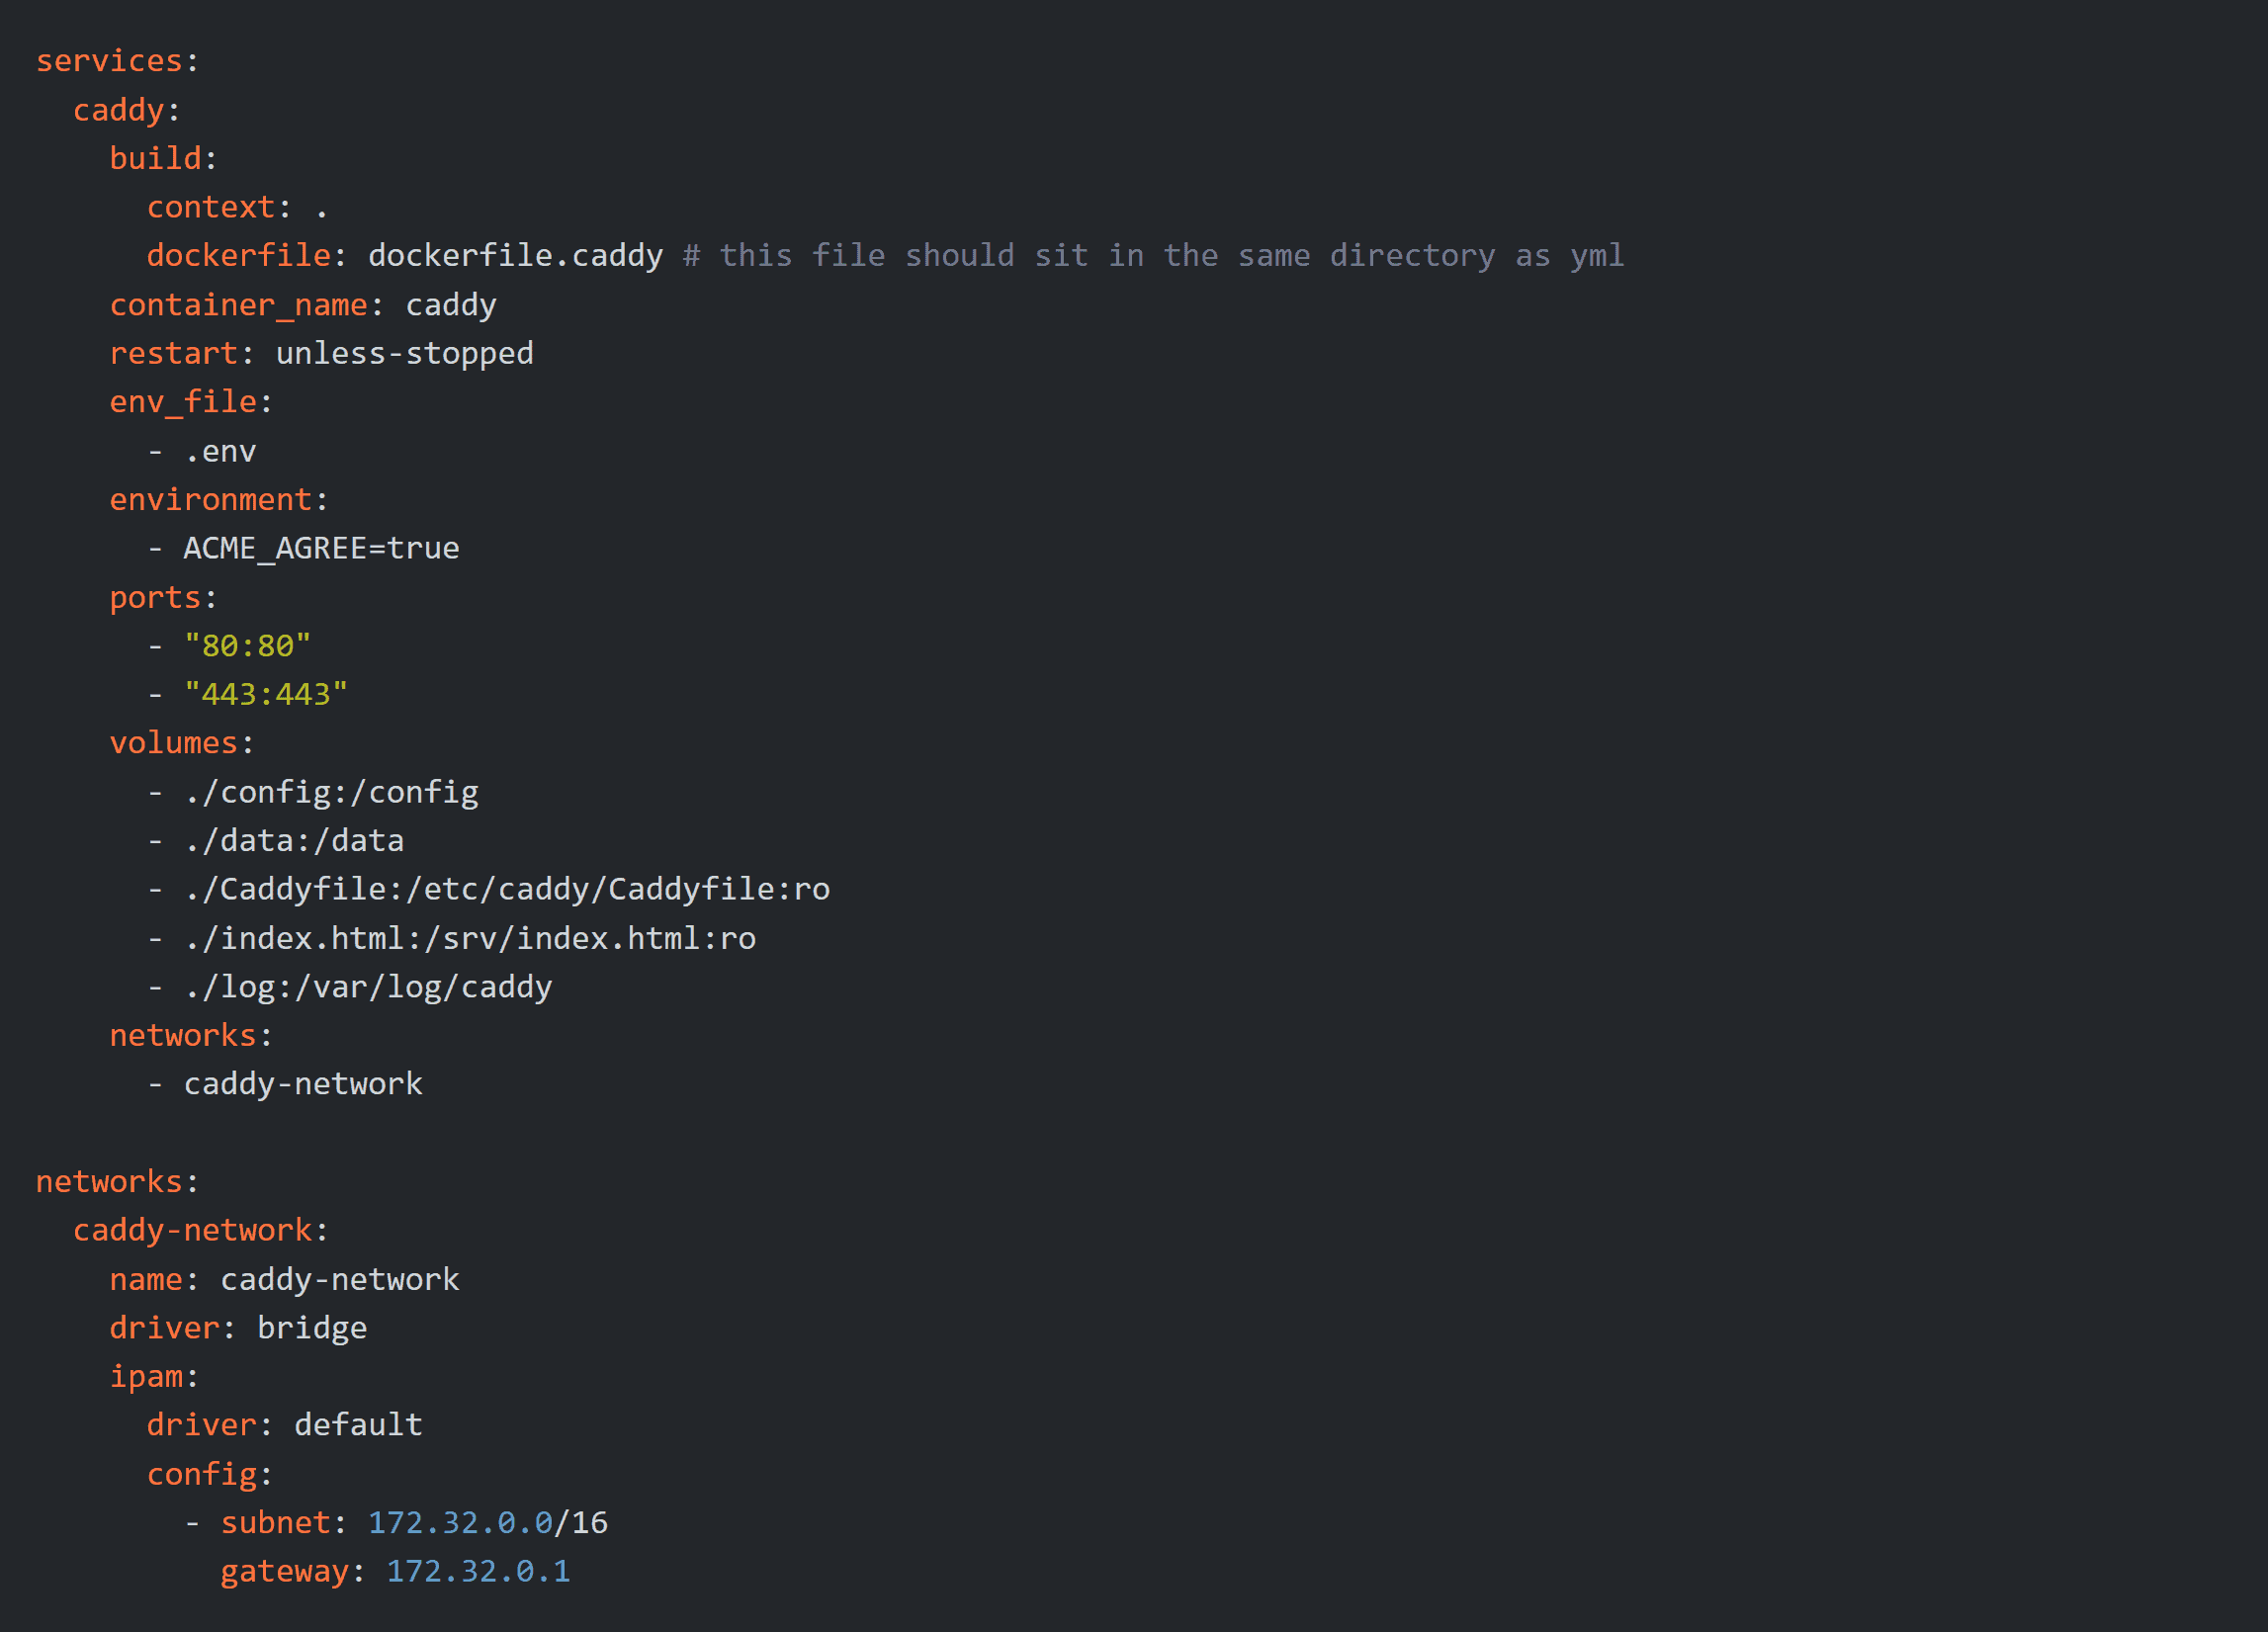
* **This is the main Caddy docker-compose.yml file that you Will used to create your container.**
* **Instead of specifying an image under the caddy services, we're going to specify a Docker file In which we Tell it how to build a custom caddy image for us.**
* **If you DO NOT want to build a custom caddy image and just use the default caddy image, you can delete this section that says:**
```yml
build:
context: .
dockerfile: dockerfile.caddy
```
**and replace it with:**
```yml
image: caddy:latest
```
* **It's always going to restart unless we manually stop it.**
* **We're telling it that it has env file to reference.**
* **We are mapping it to ports 80 and 443.**
* **We are creating five volumes for it.**
* **And finally we are creating a custom caddy Network.**
2️⃣
## Configuring .env file
* **This is the .env file. Here you will want to enter your cloudflare API token as well as the email address you log into cloudflare with. This .env file will create variables that you can reference in your Caddyfile.**

3️⃣
## Configuring dockerfile.caddy file
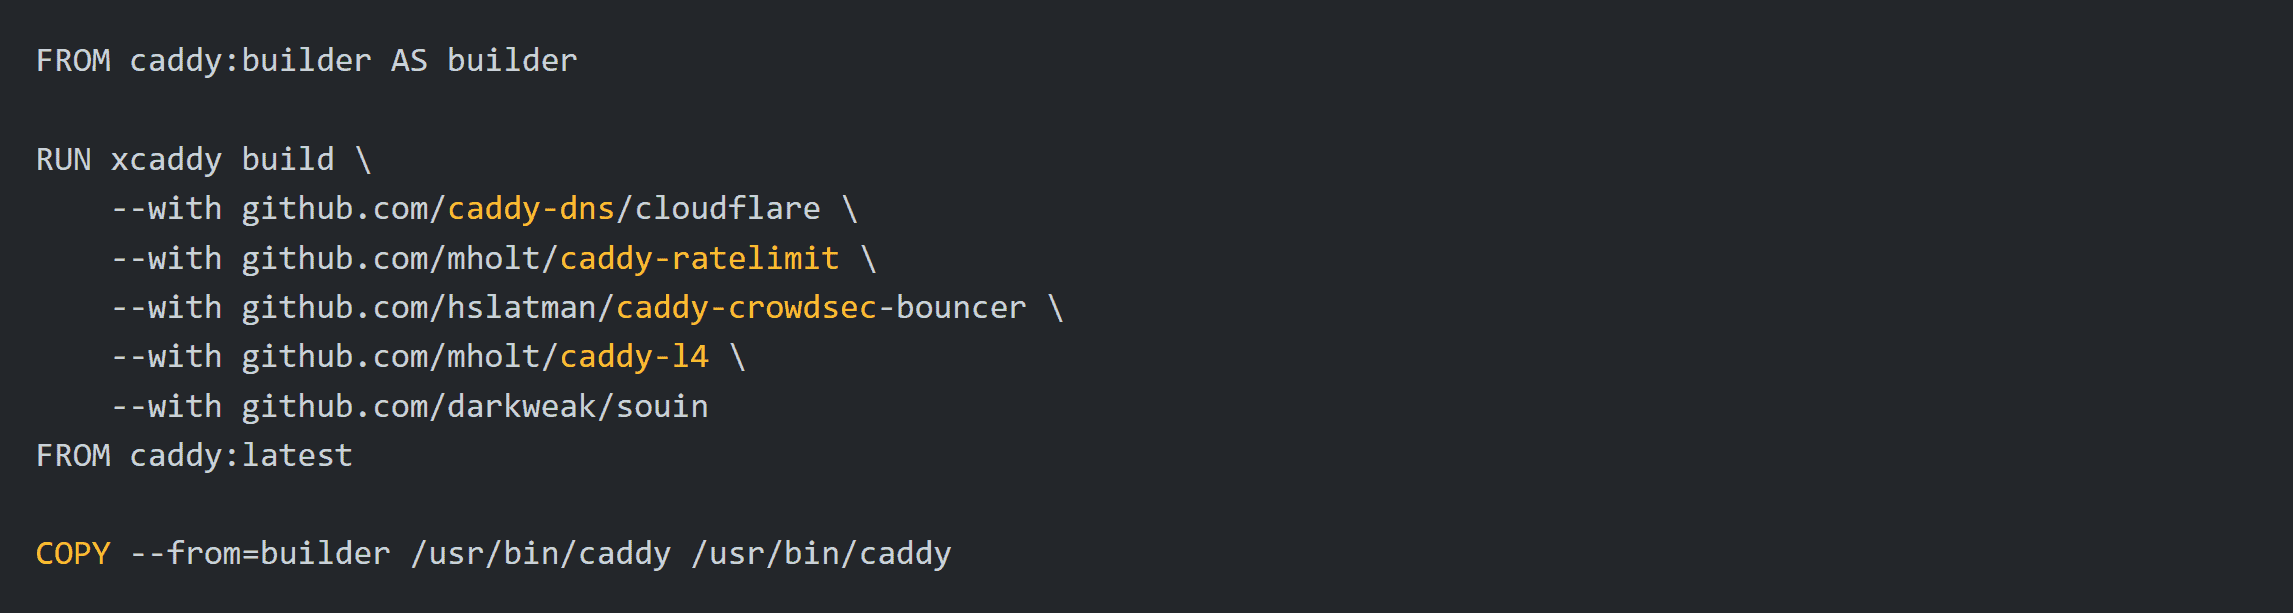
* **This is the dockerfile.caddy file that your docker-compose.yml file will use to create your custom Caddy image.**
* **Inside this file, we're going to give it some commands to create the image from caddy:builder, include some GitHub packages, attach them to the caddy:latest.**
* **And then once it's built, copy it to a specific directory**
* **When you launch the docker-compose.yml file, it will trigger this file to build your custom image automatically.**
4️⃣
## Configuring Caddyfile
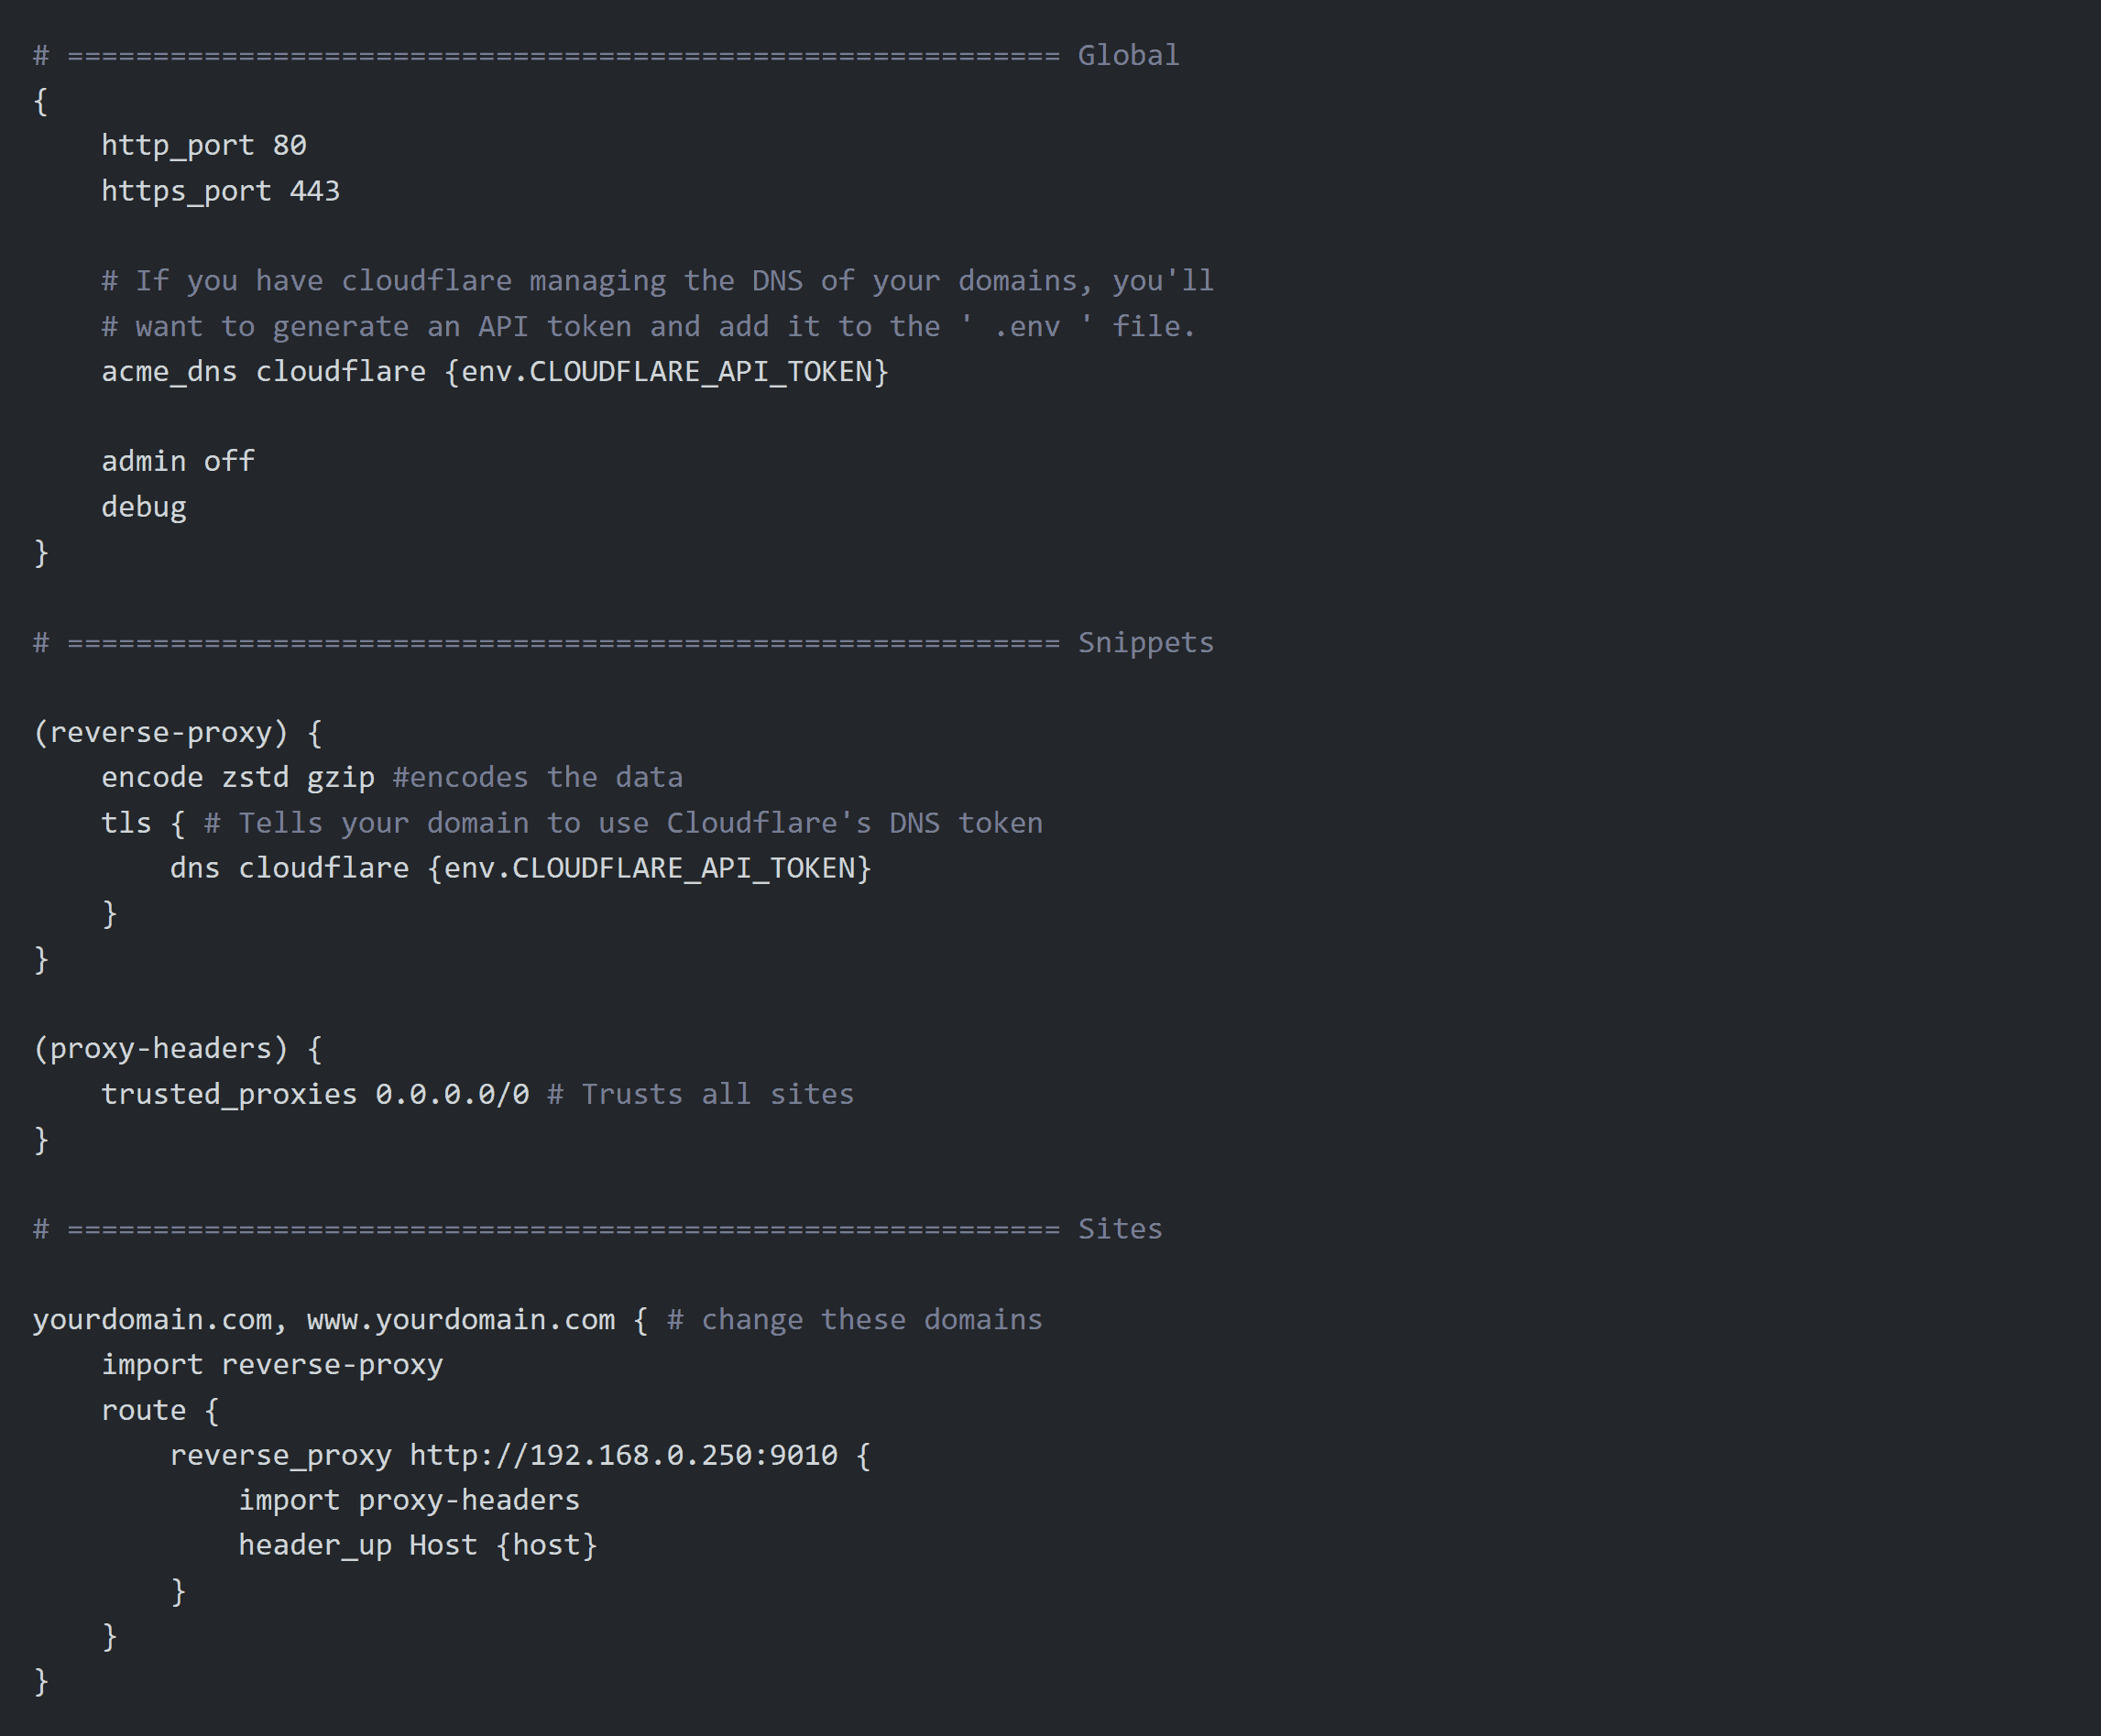
* **This is the Caddyfile. This file tells Caddy what and how to do things.**
* **Inside of the Caddyfile, I've organized it into three sections. Global, Snippets, and Sites.**
* **In the Global section, you're going to specify some default parameters .**
* **In the Snippets section, you're going to be creating variables and functions that you can import into your websites.**
* **Under the Site section, you will list your websites as well as commands for Caddy to perform on your website.**
# Execute and finish
**Once you have all of the files customized to your liking and all four of them are sitting in the same directory, you'll be ready to launch the yml file.**
**You can do this by right-clicking in an empty space in the folder where all your files are located and selecting 'Open in Terminal'.**
**That opens a Powershell window inside that direcotry where you can enter this code to launch everything.**
```ps1
docker-compose up -d
```
**And that's it! Caddy should be live ina Docker container and actively acting as a reverse proxy!**
Support the channel so I can make more tutorials!